My practical upgrade path from first serious bird photos to the setup I carry today — cameras, lenses, carry systems, and the tradeoffs that actually matter in the field.
Every quest needs gear—and when you shop through our links, you help keep the adventure alive.
As an Amazon Associate, FeatherQuest earns from qualifying purchases.
My Top Pick
Quick Answer
If someone asked me today where to start bird photography, I’d recommend the Canon R7 paired with the RF 100–400mm. That is exactly how I got serious about bird photography, and even after upgrading, it is still the combination I recommend most often.
It gives you incredible autofocus, excellent reach, manageable weight, and plenty of room to grow before you will ever feel like the camera is holding you back. For most people, this is the sweet spot between approachable and powerful.
Canon R7
This is the body I would tell most new bird photographers to start with. The crop sensor gives you extra reach, the autofocus is a massive step up from older DSLRs, and the speed makes bird photography feel possible instead of frustrating.
This is the lens that makes the R7 starter setup work so well. It is light, sharp for the price, easy to carry, and long enough to learn real bird photography without jumping straight into heavy or expensive glass.
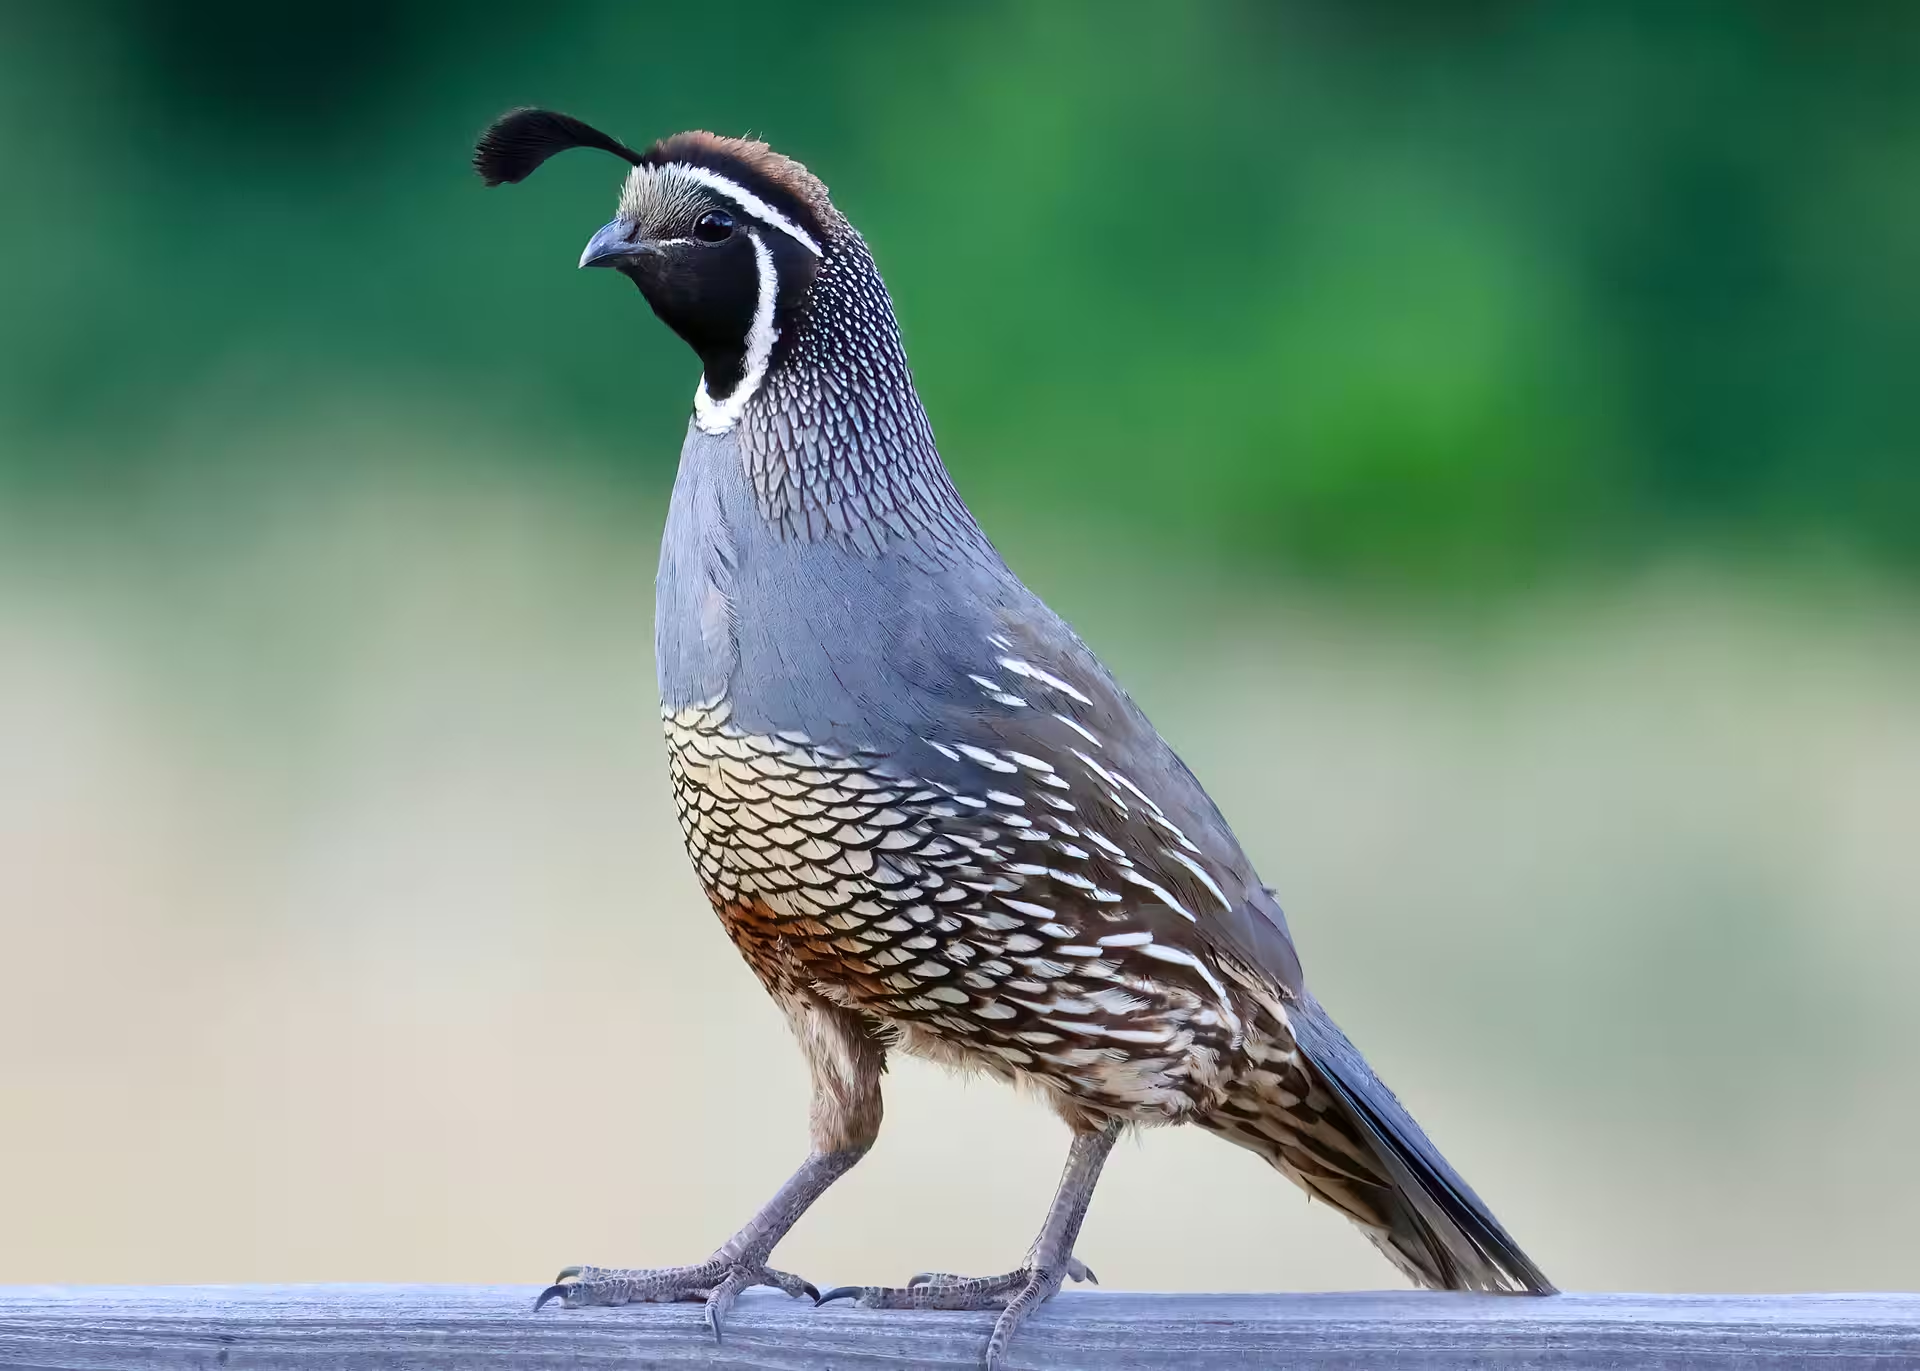
What This Starter Setup Can DoThis California Quail was photographed three days after I upgraded from an old Canon Rebel to the Canon R7 + RF 100–400mm.
My Camera Upgrade Timeline
A real progression, not a buy-it-all-at-once gear list.
📷
Apr 2022
I started bird photography with our old Canon Rebel XSi and EF-S 55–250mm — gear we already owned from 2008.
🐦
Jun 2022
I pre-ordered the Canon R7 and got it on day one, paired with the RF 100–400mm. This is where bird photography really clicked for me.
🔭
Apr 2023
After about a year, I knew I was serious. Before Alaska, I upgraded to the RF 100–500mm for more reach, detail, and L-series confidence.
⚡
Dec 2025
I moved to the Canon R5 II for stronger autofocus, full-frame flexibility, a better viewfinder, and a higher ceiling for video.
Buy a Cotton Carrier Early
This changed my field experience more than almost any accessory.
If there is one accessory I would buy as soon as possible, it is a Cotton Carrier. Carrying a camera on your neck or in your hands gets old fast. A good carry system keeps the weight off your neck, keeps your hands free, and keeps the camera instantly accessible when a bird suddenly appears.
I chose the belt because I like having the weight and camera at my hip while I hike and move through the field. The chest harness works great too, especially if you prefer the camera centered on your body, want it closer while sitting, or spend a lot of time getting in and out of a car.
The point is not belt vs. harness. The point is that your camera needs to be comfortable enough that you actually carry it and ready enough that you do not miss the moment.
Cotton Carrier Sling Belt
This is hands-down one of the best things I have bought for bird photography. I use the belt because it fits my hiking style, keeps the camera secure, and lets me react without carrying the camera in my hands all day.
A strong alternative to the belt, especially if you prefer the camera centered on your chest, want it closer while sitting, or spend a lot of time getting in and out of a car. I personally use the belt, but the harness may be the better fit for some birders.
Hands Free, Camera ReadyThis is why I use the belt: even while traveling, hiking, or boarding a plane, the camera stays secure at my hip instead of hanging from my neck or filling my hands.
The Lens Upgrade: RF 100–500mm
The lens I carry almost every day.
The RF 100–400 was not a mistake or a toy lens. It was the right place to start. But after about a year with that setup, I could tell bird photography had become more than a passing interest. I was serious about this new hobby, and with an Alaska trip coming up, I wanted the extra reach, sharper pixel-level detail, weather sealing, and confidence that came with Canon’s L-series glass.
That is where the RF 100–500 became my workhorse. It is still portable enough for my one-camera, one-lens approach, but it gives me the image quality and flexibility I want for everyday birding, travel, family trips, and serious photo outings.
Canon RF 100–500mm f/4.5–7.1L IS USMMy current workhorse lens: sharp, versatile, weather-sealed, and still portable enough for one-camera, one-lens birding.
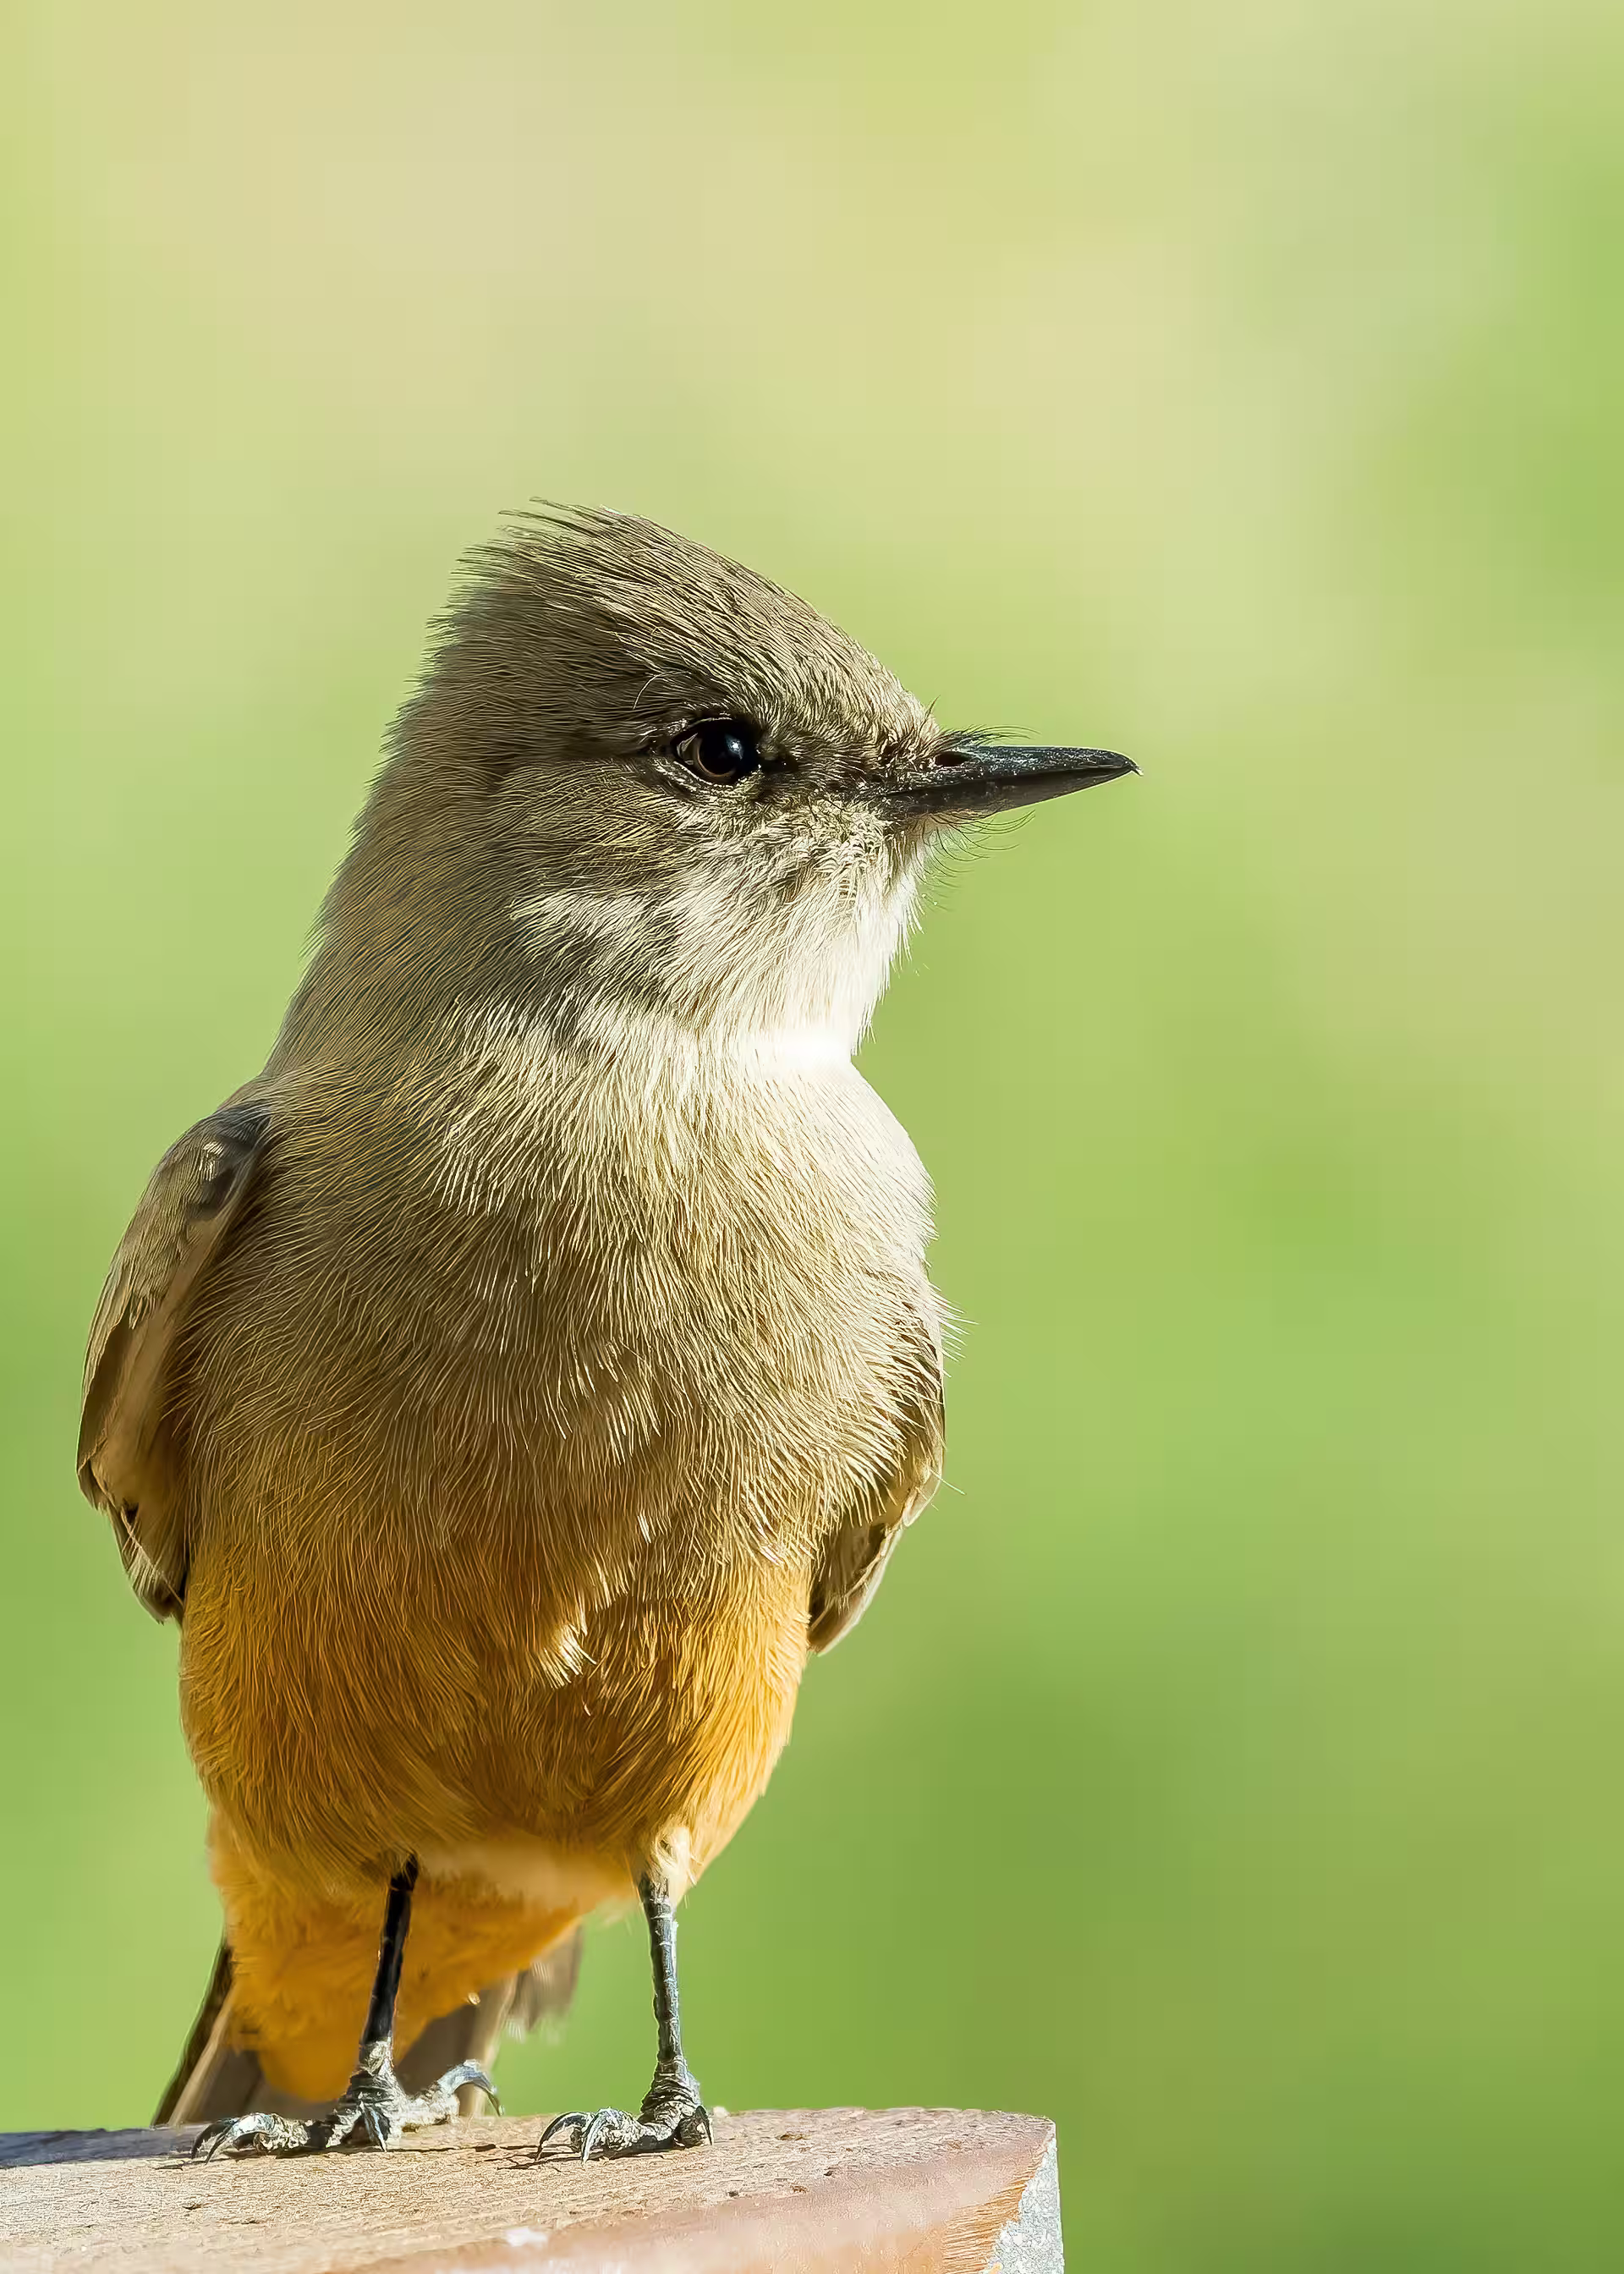
The Workhorse LensThis Say's Phoebe portrait shows why the RF 100–500 became my everyday birding lens: sharp detail, clean background separation, and enough flexibility to stay on the camera.
The Camera Upgrade: Canon R5 II
Why I finally moved beyond the R7.
I did not move on from the R7 because it was bad. I moved on because my skill level and the kinds of birds I wanted to photograph started asking for more — especially with fast, unpredictable subjects like swifts, swallows, and hummingbirds.
Pre-capture was one reason I upgraded, along with faster autofocus, but I want to be honest: I have not fully loved pre-capture yet. Out of the box, it was frustrating to toggle through the menu, and every time I used it I had to clean up three to five times more photos afterward. Canon’s newer firmware controls should make it much more practical, so I am still excited about its potential.
I do sometimes miss the reach of the R7. A crop sensor makes distant birds feel closer in a way that is hard to ignore. But the extra megapixels on the R5 II give me room to crop aggressively in post, and the full-frame sensor is a real advantage when a bird gets close. Instead of backing up or zooming out, I can keep the lens at 500mm, fill the frame, capture more pixels on the subject, and get deeper background blur.
The unexpected bonus has been the bigger viewfinder and wider view of the scene. It is genuinely a joy to look through, and seeing more around the bird helps with swallows, fast-moving subjects, and habitat-style images. It has also pushed me toward more hero images for FeatherQuest, with more flexibility for cropping. Video is another area where I can already tell the R5 II has a much higher ceiling than the R7 — and I still have a lot to learn there.
Canon R5 IIMy current body upgrade: stronger autofocus, more crop flexibility, better close-subject handling, a bigger viewfinder, and a much higher ceiling for video.
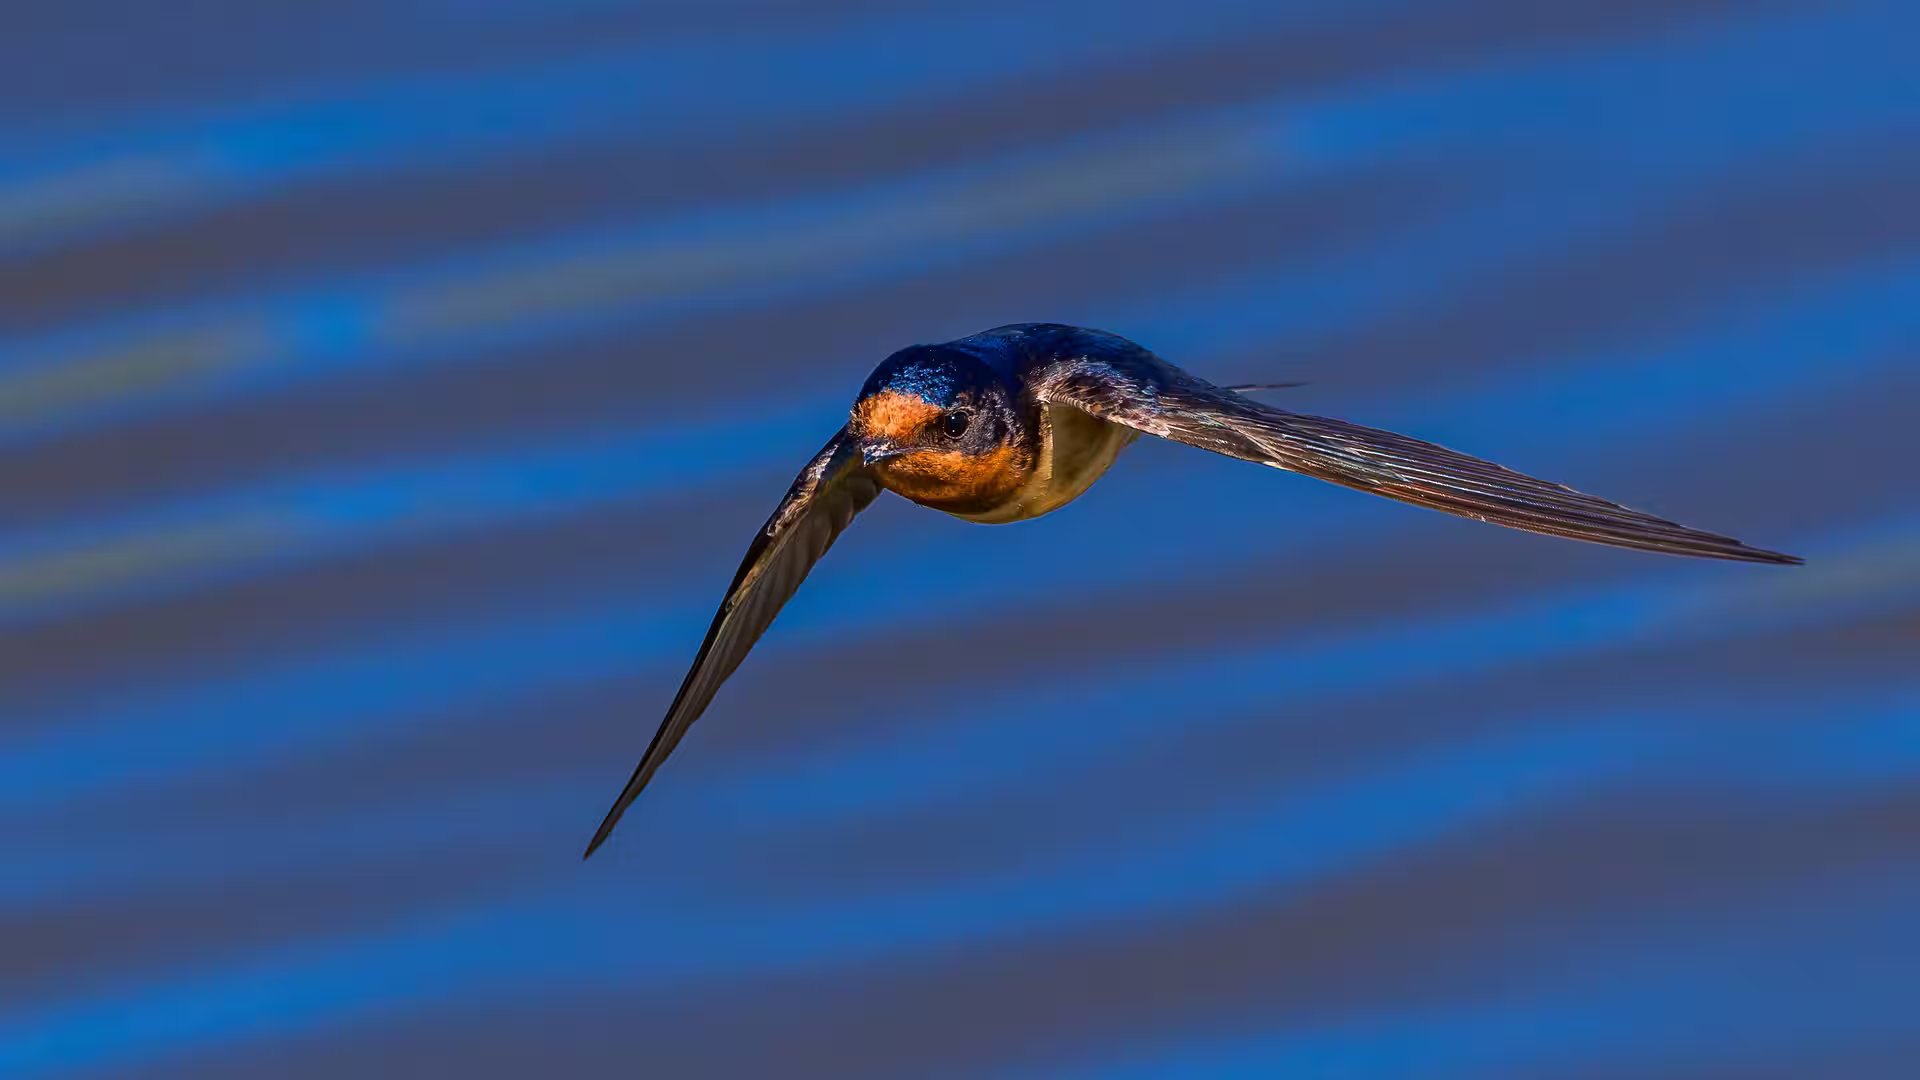
Faster Birds, Better OddsThe R5 II did not magically make me a better photographer, but the autofocus, viewfinder, and wider scene view have given me more confidence with fast-moving birds like swallows.
Should You Buy a Superzoom First?
Only if size and simplicity matter most.
There is one big exception to my R7 recommendation: size. If your main goal is carrying the smallest, simplest camera possible, a superzoom or compact point-and-shoot can still make sense.
The tough part is that Canon discontinued the PowerShot SX70 HS, which is the kind of camera I wish still had a modern successor. You can look at options like the Panasonic LUMIX FZ80D or Nikon COOLPIX P950 if you want a true superzoom, and if portability matters more than reach, the Canon PowerShot SX740 is probably the more natural compact option.
But once you are spending real money on a superzoom, the decision gets harder. Unless your primary reason for buying one is size, weight, or simplicity, I would personally put that money toward the R7 system instead. You will get a setup that grows with you instead of one you may outgrow quickly.
Panasonic LUMIX FZ80D
A modern bridge camera option worth considering if you want a built-in superzoom lens and do not want to manage interchangeable lenses. Best for people who value simplicity more than long-term upgrade flexibility.
A popular long-reach superzoom option for birders who want extreme zoom in a single package. It is larger than a compact camera, so I would choose it for reach rather than pocketability.
If the reason you are not buying an R7 is size, this is the kind of camera I would look at first. It is more about portability and always-having-a-camera than maximum bird photography performance.
Interesting, loved by many, but not the best fit for how I bird.
The Canon RF 200–800mm is probably one of the lenses I get asked about most, and I understand why. A lot of bird photographers love it. The extra reach is real, and for distant birds, shorebirds, raptors, and open landscapes, it can make a lot of sense.
The reason I do not personally use it comes back to my one-camera, one-lens mentality. The RF 100–500 gives me more flexibility for nearby birds, mammals, family moments, landscapes, and travel. The RF 200–800 is tempting, but for the way I bird, I would rather have versatility than maximum reach.
There are tradeoffs too. The 200–800 gives you more reach, but it is not an L-series pro lens, so you give up some of the quality and refinement of the RF 100–500. You also lose a stop of aperture on the long end, and the lens is a little heavier.
That does not make it a bad choice. It just makes it a different choice. If your birding is mostly distance-based and you are comfortable carrying the extra size, it may be a great fit. If Canon ever releases a pro-series version of this lens, though, that would definitely get my attention.
Canon RF 200–800mm f/6.3–9 IS USMA serious-reach bird photography lens that many birders love, though I still prefer the RF 100–500 for its L-series quality, lighter weight, and better versatility.
The Canon 600mm f/4 is the dream lens for a reason. The light gathering, subject separation, reach, and image quality are all incredible. If I were photographing one target from a blind or working in a professional setting, this is the kind of lens that would be hard to ignore.
But for how I actually bird, it brings complications. It is expensive, heavy, specialized, and it breaks the simple photography philosophy I have slowly developed: one camera, one lens. I like walking out the door with one setup and knowing I am ready for almost anything.
So yes, it is still the dream. But it is a dream with tradeoffs.
Canon EF 600mm f/4L IS III USMThe dream lens: unbelievable reach, light, and subject separation — with size, cost, and complexity that do not always fit everyday birding.
Do not let the price of your dream setup stop you from starting. Bird photography gets expensive fast, but you do not need a pro body and a giant lens before you can learn, explore, and make photos you are excited about.
Start where you can. Use an older camera, buy a used setup, borrow gear, or choose the lens that fits your budget right now. The most important thing is getting outside enough to learn what you actually enjoy photographing and what is truly limiting you.
The other thing I did not appreciate early on is how healthy the used camera market is. I have used both eBay and local online classifieds to sell older gear, and both were straightforward ways to turn previous gear into upgrade money. If you take care of your equipment, you are rarely starting over from zero.
You do not have to buy your forever setup on day one. Start with gear that gets you outside, build skill, learn your real limits, and upgrade only when the next step actually makes sense.
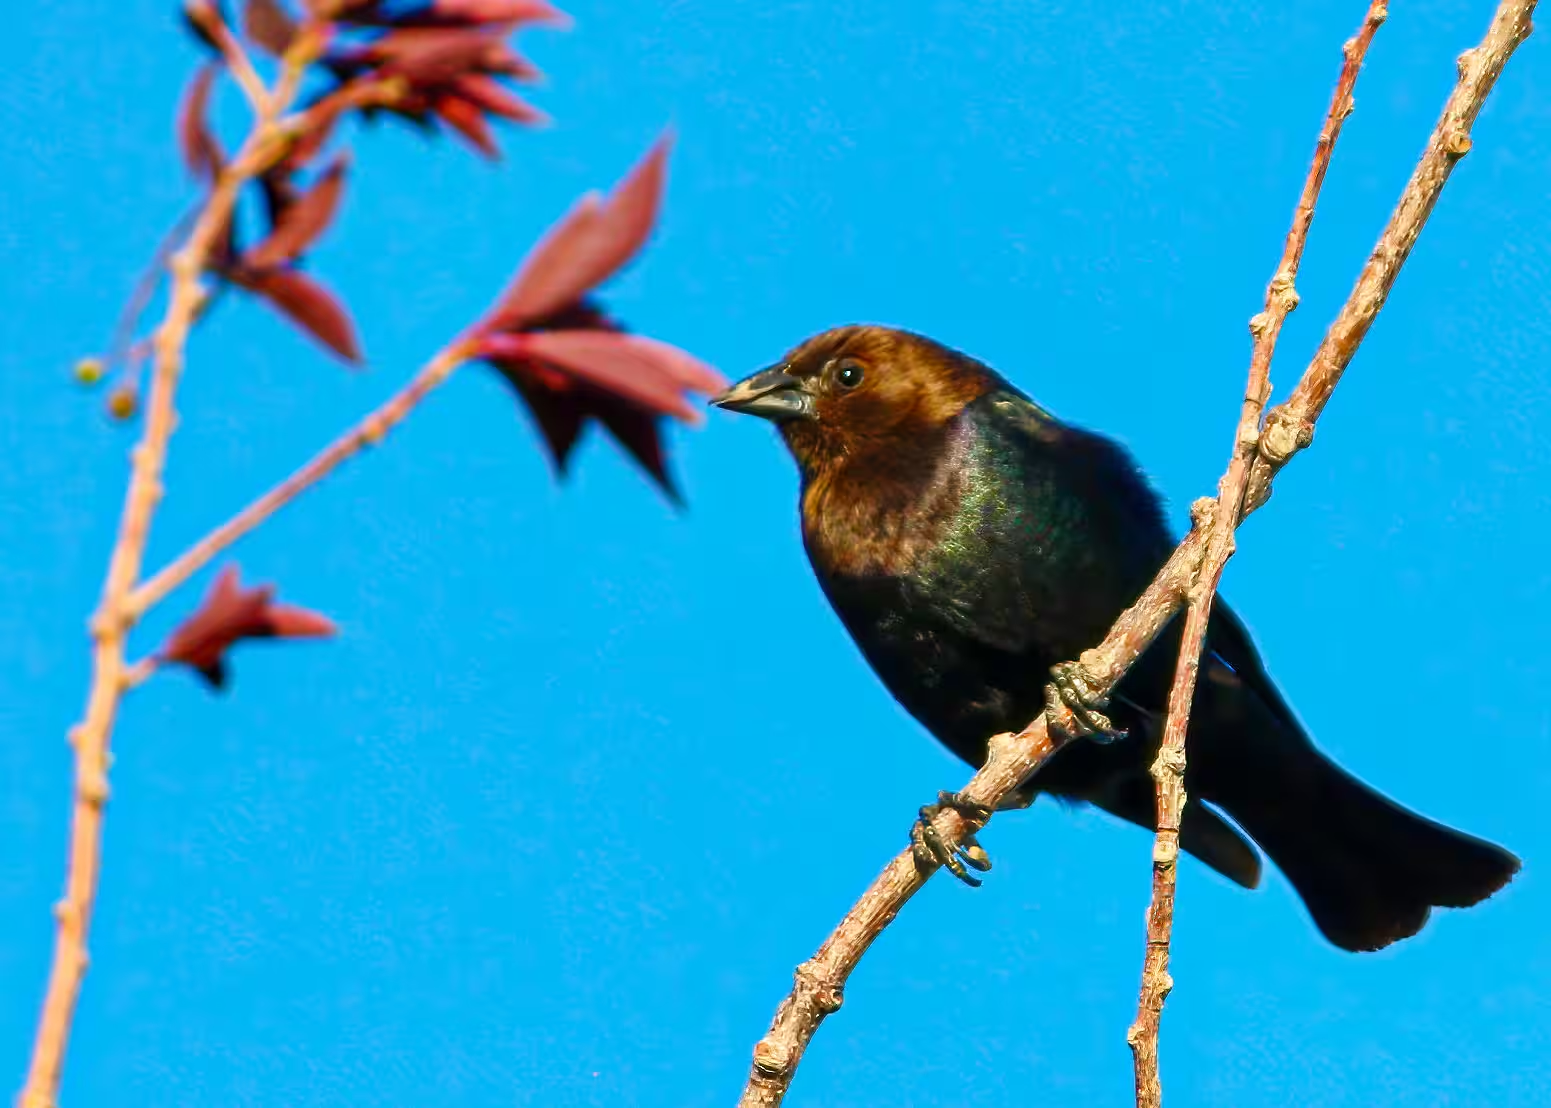
Start With What You HaveOne of my early bird photos with our old Canon Rebel XSi and EF-S 55–250mm — a camera we bought in 2008, long before I ever imagined getting into bird photography. It wasn't my dream setup, but it was enough to get me started.
Other Accessories I Actually Use
The smaller things that make bird photography smoother.
Once the camera, lens, and carry system are handled, these are the smaller pieces of gear that quietly make bird photography easier: faster cards, safe cleaning tools, a simple support option, and a way to enjoy the photos after the trip is over.
Kingston Canvas React Plus 128GB
When you shoot birds in burst mode, card speed matters. A fast UHS-II card helps the camera clear its buffer so you are ready for the next moment instead of waiting.
This is the exact cleaning kit I use. Start with the blower, move to the brush, and finish with the microfiber cloth. Simple, safe, and better than grabbing the wrong cloth in a hurry.
I do not use a monopod every day, but it is the kind of support that makes sense as lenses get longer. It adds stability without committing to a full tripod.